- Create two folders – one named ISO and another named mount- at the root of your C drive.
- Save the ISO file for the Windows Server version you’re upgrading to in your created ISO folder.
- You must extract the ISO files to modify the evaluation registry during the Windows server installation. To do this, download 7Zip.
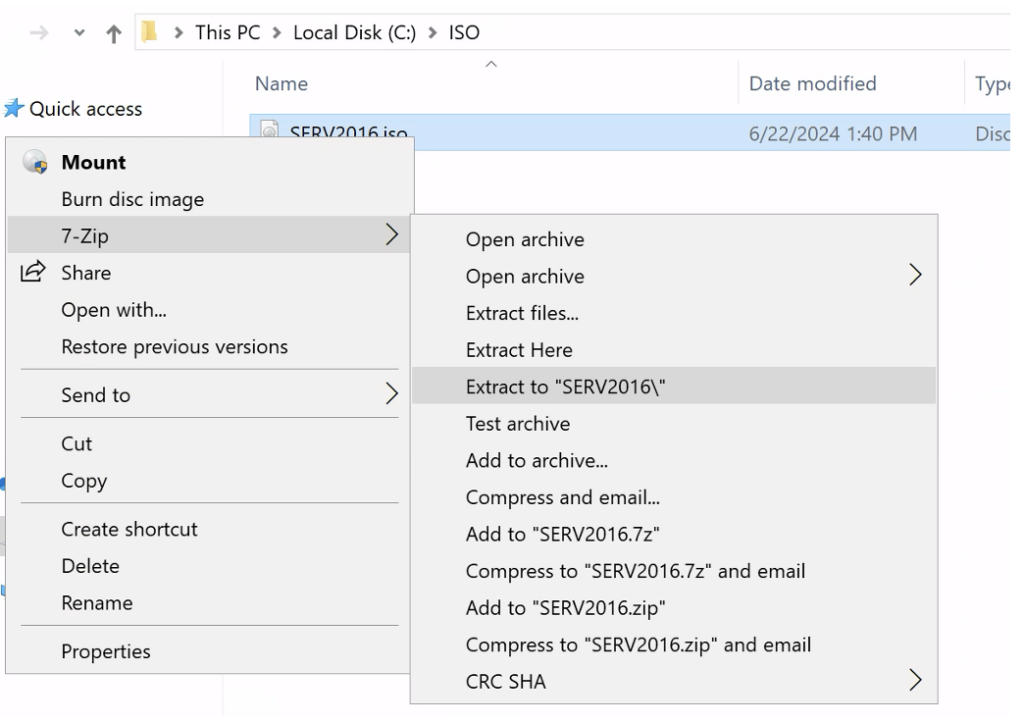
- Right-click on the ISO file – in the context menu, select 7Zip and choose the Extract to “ISOFilename\“ option. For example, the ISO name in the screenshot below has the name SERV2016, so we’re extracting to “SERV2016\”

- Open a command prompt as an administrator and run the following commands. In the screenshot above, we’re using the SERV2016 ISO as an example; you will have to update the command to include the name of your ISO. Additionally, the example above is for Windows Server Standard Edition—if you’re using the data center version, update the fourth command to match your current edition.
dism /mount-wim /wimfile:c:\ISO\SERV2016\sources\install.wim /mountdir:c:\mount /index:2
dism /image:c:\mount /get-currentedition
dism /image:c:\mount /get-targeteditions
dism /image:c:\mount /set-edition:ServerStandard
dism /unmount-wim /mountdir:c:\mount /commit
Copy
After successfully doing the steps above, you can run the in-place upgrade and keep your current files and apps.
After modifying the evaluation registry, follow these steps to run the in-place upgrade:
- Run Setup from Extracted Folder:
- Open the extracted ISO folder.
- Run
setup.exefrom this folder instead of mounting the ISO file. The extracted folder contains the modified setup file that matches your current Windows Server version.

